Shipping from Sculpteo

I was wrong about shipping from Sculpteo. They did send me email this morning telling me that my order has shipped. Of course, there is no tracking number as they already told me. But I’m hoping that regular mail will get from the Bay Area in a couple of days. Their projection when I ordered was as late as April 25th, so I certainly hope it doesn’t take that long. Good to know it’s on the way…

More tests

Since it will be  a while before my new coil design is ready, I took the take to get my test platform setup:

ElectroMagnet Test Platform

This gives me a switch so I can turn each coil on and off independently. It also lets me turn them all off and adjust the voltage accurately before applying power to the coils again.

Just like on my spinner platform, these switches made things work much better! I don’t have the coil secured (waiting on my new coil design with mounting points for that), but I was still able to learn some things.

First, using the coil that is slightly larger than the other, I did tests to see how much current I can push through there. And again I kept my temperature probe on the coil so I could monitor if it was getting too hot. Better picture here:

Coil Test Closeup

I ended up with this:

5V 10V 12V 15V 20V
0.64A (84°F) 1.25A (100°F) 1.40A (120°F) 1.60+A (HOT) 2.0+A (170+°F)

My notes from things I tested:

  • Switching between the two coils, I was unable to get the nail to move back and forth, no matter what voltage I used. (I later learned this may be due to the length of the nail.)
  • It takes a long time for the coils to cool. Even brief pulses at 15V cause the temperature to shoot up to 130°.
  • I tried using a scale to measure how much force the electromagnet exerts. Most of the tests, I got absolutely nothing. While playing with 20V, I noticed that I got a strong pull right when the end of the nail was coming out of the coil. I measured that at 60 grams. (I’m not sure what force that is–I suppose the equivalent force that it takes to pull 60 grams against gravity.)
  • At 10V, there is no noticeable pull on the nail. I’m not sure how little I can feel, but I’m sure this is quite light.

Checking in with the Shapeways design specs, I see that the flexible plastic is only heatproof to 176°F. This is clearly a problem as it quickly gets that hot at the minimum voltage that I felt a significant pull.

I need to try either other wire sizes, better heat sinking materials, or a different design.

Test bed enhancements

I haven’t done a lot with the spinner lately. My last test was to make a straight horizontal line that was not along the axis. I had problems with that which I attributed to not having enough high resolution timers, so I set it aside to play with my electromagnet tests. But, one thing that was still bugging me was having to use alligator clips to turn the motor on and off. That didn’t make a consistently good connection and the motor speed was clearly unstable at time. So, I finally hooked up my 69¢ switch:

SpinnerSwitchTest

If you look close, you can also see the horizontal line test. In fact, now that I look at it, the right hand side actually looks like I expect. It’s a pretty straight line. The left side is also straight, just not horizontal. Hmmm… I wonder if my real problem is just with my algorithm for calculating the line. There may be some hope here yet…

But the switch works much better than my old technique. The motor reliably turns on and off and runs at a constant speed now! So future tests will go much more smoothly.


Revised coil design

I had the day off of work today, so I finally had a chance to work on my new coil design with connections on the bottom so it can be mounted and tabs on the top so I can mount a  PCB.

After reading about other people using SketchUp, I decided to try that. I do like a lot of the features, like being able to directly manipulate the design and measure to make sure things are aligned exactly like I expect. But, I also ran into problems. I wasn’t able to do difference operations on cylinders. Difference operations aren’t directly supported anyway, but once I tried to an intersection with a cylinder so I could remove parts, things get really messed up. I also had problems with simpler shapes because SketchUp isn’t a solid modeling tool, so I wasn’t sure if things I was creating would be solid or just exterior walls.

But, SketchUp was great for being able to sketch my design so I could model it in OpenSCAD:

ElectroDesign-Iso-Sketchup


Once I had the dimensions all figured out, it was much easier to go step by step and add all the design features I wanted. This went much more quickly than when I tried it before without doing a SketchUp first:

ElectroDesign1-Iso


I also did some research to find a company other than Shapeways where I could get it printed cheaply, but not have to wait for shipping from the East Coast. I did find Solid Concepts which has an office in San Diego! Perhaps I can just go pick it up in a day or two! Sadly, of all the materials I tried, the cheapest I could find still cost $80 for this piece, which is over 10 times greater than what Shapeways charges. A little more research and I found Sculpteo. They’re not in San Diego, but at least they’re in California. Costs under $8 and says it ships in 4 days! So, I decided to give them a try. The cheapest shipping still cost $6 but comes with absolutely no tracking information. As far as I can tell, Sculpteo doesn’t give any information about when my design actually ships (unlike Shapeways), so I just have to wait and see when it arrives. I’ll hold off judgement on them until I see how long it ends up taking…

First real tests

I didn’t have a good plan for how to wind this thing, other than that I figured my drill was the best option since I can run it really slow. Digging through my tools from my Harbor Freight rotary tool, I found an attachment with a nice rubber piece a quarter inch in diameter. Looks good at first:

Ready to wind


Then I put the spool of wire on a dowel and put the dowel between my sandals and toes to hold it in place. This actually worked better than I expected! I wound the first section really easily and didn’t have any problems with anything breaking. One the second one, the rubber piece started slipping, but I managed to salvage it enough to finish off the second coil:

Wound coils


Looks like I do need to find a way to make sure the coils are the same size. I didn’t have too much time, but I did a quick test. The resistance on the first coil measures out to ~6 Ω, which is about what I expected. I should be able to run at 6V and get 1 A through it without any problem. This time I was prepared for the coil to get warm, so I setup my meter to monitor the temperature.

At 5V, I could feel a little pull the nail I am using as my shaft right now. I’m sure I can find something better, but that’s all I have that fits in there right now. At 10V, I could feel a significant pull on the nail, but then the temperature jumped up to 100°F. The coil didn’t actually feel warm, but I shut it all down because I didn’t want to risk destroying it.

First Prototype complete!

I got my prototype back from shapeways today!

First PrototypeThe only bad thing I noticed here is that the holes I planned to put the wires through don’t go all the way through. There is a visible dent there (and a black dot on one where I tried to poke a pen through), but not an actual hole. Those holes are already way bigger than I needed for the wire, but clearly still too small for this material, even though it sounded like it would work. Well–that’s one of the reasons I did this quick test–just to see if everything worked as I expected. The walls actually seem thicker than I need, but I reserve final judgement until I wind one and see if it ends up breaking.

But, I’m out of town for a wedding this weekend, so I won’t get any more done on this until next week…


Counter Test 2

Counter Test 2 works, but not quite right. For some reason, I have to set the prescaler on timer 2 to /64. At first, that worked quite well and gave me exactly what I expected, but by the time I got the camera out, the lines were no longer at 3, 6, 9, and 12:

Those lines should be at 3, 6, 9, 12 o'clock. Something's not quite right...

Those lines should be at 3, 6, 9, 12 o’clock. Something’s not quite right…

I suspect my problem here is that I should really be adjusting the prescalers on the fly instead of using the hardcoded values I designed in. My guess is that I’m overflowing what will fit into the 8 bit timer. I wish I could tell what I was writing in there. I may need to write the binary value again.

The code I used for this is:

1
2
3
4
5
6
7
8
9
10
11
12
13
14
15
16
17
18
19
20
21
22
23
24
25
26
27
28
29
30
31
32
33
34
35
36
37
38
39
40
41
42
43
44
45
46
47
48
49
50
51
52
53
54
55
56
57
58
59
60
61
62
63
64
65
66
67
68
69
70
71
72
73
74
75
76
77
78
79
80
81
82
83
84
85
86
87
88
89
90
91
92
93
94
95
96
97
98
99
// Using the spinner board to test 328 counters
 
#include <SPI.h>
 
const int HALL  =  2; // PD2
const int BLANK =  8; // PB0
const int LAT   =  9; // PB1
 
const int HALL_INT = 0; // Hall effect interrupt 0 on PD2 (INT0)
 
unsigned int savedCounter = 0;
unsigned int slice = 0;
 
void hallStart(void) {
  // TCNT1 is counts per full revolution
  savedCounter = TCNT1;
  TCNT1 = 0;
 
  // Also reset TCNt2 (slice counter) so we always start in a known
  // state
  TCNT2 = 0;
 
  // Calculate a new compare value for timer 2 based on how fast our last revolution was.
  // 512 angle slices, so divide the savedCounter by 512 to get the count per slice
  // But we also have a /8 prescaler, so instead divide by 4096
  int sliceCount = savedCounter / 4096;
 
  // Saved the new slice counter
  OCR2A = sliceCount;  
 
  // Reset the slice number
  slice = 0;
 
  // Now start the 8 bit counter 2
  TCCR2B = 6;                   // Set /256 prescaler
}
 
// ISR for the timer to switch the LEDs
ISR(TIMER2_COMPA_vect)
{
  if (slice == 0 || slice == 128 || slice == 256 || slice == 384)
  {
    setLeds(0xFFFF);
  }
  else if (slice == 1 || slice == 129 || slice == 257 || slice == 385)
  {
    setLeds(0x0001);
  }
 
  slice++;
}
 
void setup() {
  digitalWrite(LAT, LOW);
  pinMode(LAT, OUTPUT);     
 
  digitalWrite(BLANK, HIGH);
  pinMode(BLANK, OUTPUT);     
 
  pinMode(HALL, INPUT_PULLUP);
 
  // Setup the 16 bit counter counter 1
  TCCR1A = 0;                   // Turn off output compare modes
  TCCR1B = 2;                   // Turn on clk/8 prescaler
 
  // Setup 8 bit counter 2
  TCCR2A = 2;                   // CTC mode
  TCCR2B = 0;                   // Start with timer off
  TIMSK2 = 2;                   // Enable Output Compare A interrupt
 
  attachInterrupt(HALL_INT, hallStart, FALLING);
 
  SPI.begin();
  SPI.setDataMode(SPI_MODE0);
  SPI.setBitOrder(LSBFIRST);
  SPI.setClockDivider(SPI_CLOCK_DIV2); // Datasheet says 35 MHz max, so 8 MHz is fine
 
  TCNT1 = 0;
}
 
void setLeds(unsigned int pattern) {
  // Blank the LEDS
  digitalWrite(BLANK, HIGH);
 
  // Transfer the data
  SPI.transfer(pattern & 0xFF);
  SPI.transfer(pattern >> 8);
 
  // Latch the data
  digitalWrite(LAT, HIGH);
  digitalWrite(LAT, LOW);
 
  // Unblank the LEDS
  digitalWrite(BLANK, LOW);
}
 
void loop() {
  // That's right--nothing to do here
}


Counter Test 1

My first test actually went quite well. The counter worked just like I expected and I got the counter information I wanted:

LEDs displaying a binary pattern showing the value of the counter for how long the last rotation took. MSB is the innermost LED.

LEDs displaying a binary pattern showing the value of the counter for how long the last rotation took. MSB is the innermost LED.

For this picture, I used a flash, then kept the shutter open a bit. The spinner is actually traveling clockwise, so the trail of LEDs is actually in front of the spinner, not behind it as you would expect.

Anyway–the reason I used the flash was so I could see where each of the LEDs was mounted and could accurately count which ones are off. The MSB is the innermost one, so this counter value is 100011000100000b which is 4620h. This is about 2.5 times smaller than what I predicted. The counter values also change a lot more than I expected. I thought the least significant 2-3 bits would vary, but I actually see the least significant 8-9 bits changing. I know the battery is running low for my battery, so maybe the counter values I’m seeing are accurate.

Here’s the code I used to do this:

1
2
3
4
5
6
7
8
9
10
11
12
13
14
15
16
17
18
19
20
21
22
23
24
25
26
27
28
29
30
31
32
33
34
35
36
37
38
39
40
41
42
43
44
45
46
47
48
49
50
51
52
53
54
55
56
57
58
59
60
61
62
//  Using the spinner board to test 328 counters
 
#include <SPI.h>
 
const int HALL  =  2; // PD2
const int BLANK =  8; // PB0
const int LAT   =  9; // PB1
 
const int HALL_INT = 0; // Hall effect interrupt 0 on PD2 (INT0)
 
unsigned int savedCounter = 0;
 
void hallStart(void) {
  savedCounter = TCNT1;
  TCNT1 = 0;
}
 
void setup() {
  digitalWrite(LAT, LOW);
  pinMode(LAT, OUTPUT);     
 
  digitalWrite(BLANK, HIGH);
  pinMode(BLANK, OUTPUT);     
 
  pinMode(HALL, INPUT_PULLUP);
 
  // Setup the 16 bit counter
  TCCR1A = 0;                   // Turn off output compare modes
  TCCR1B = 2;                   // Turn on clk/8 input
 
  attachInterrupt(HALL_INT, hallStart, FALLING);
 
  SPI.begin();
  SPI.setDataMode(SPI_MODE0);
  SPI.setBitOrder(LSBFIRST);
  SPI.setClockDivider(SPI_CLOCK_DIV2); // Datasheet says 35 MHz max, so 8 MHz is fine
 
  TCNT1 = 0;
}
 
void setLeds(unsigned int pattern) {
  // Blank the LEDS
  digitalWrite(BLANK, HIGH);
 
  // Transfer the data
  SPI.transfer(pattern & 0xFF);
  SPI.transfer(pattern >> 8);
 
  // Latch the data
  digitalWrite(LAT, HIGH);
  digitalWrite(LAT, LOW);
 
  // Unblank the LEDS
  digitalWrite(BLANK, LOW);
}
 
void loop() {
  if (savedCounter != 0) {
    setLeds(savedCounter);
    savedCounter = 0;
  }
}

So, the only way to find out if my counter values are correct is to do the next test:

  • Each time I get the hall effect interrupt, read the 16 bit counter (counter 1)
  • Divide that by 4096, which is 512 (the number of slices) * 8 (the prescaler), then set that value in output compare A register for 8 bit timer 2. In CTC mode, this gives us an interrupt every time the counter value is matched.
  • Each time we get a timer 2 interrupt, increment the slice counter. On slices 0, 128, 256, and 384, turn on all the LEDs for one slice. This should display lines at the 12:00, 3:00, 6:00, and 9:00 positions


Polar vs. rectangular

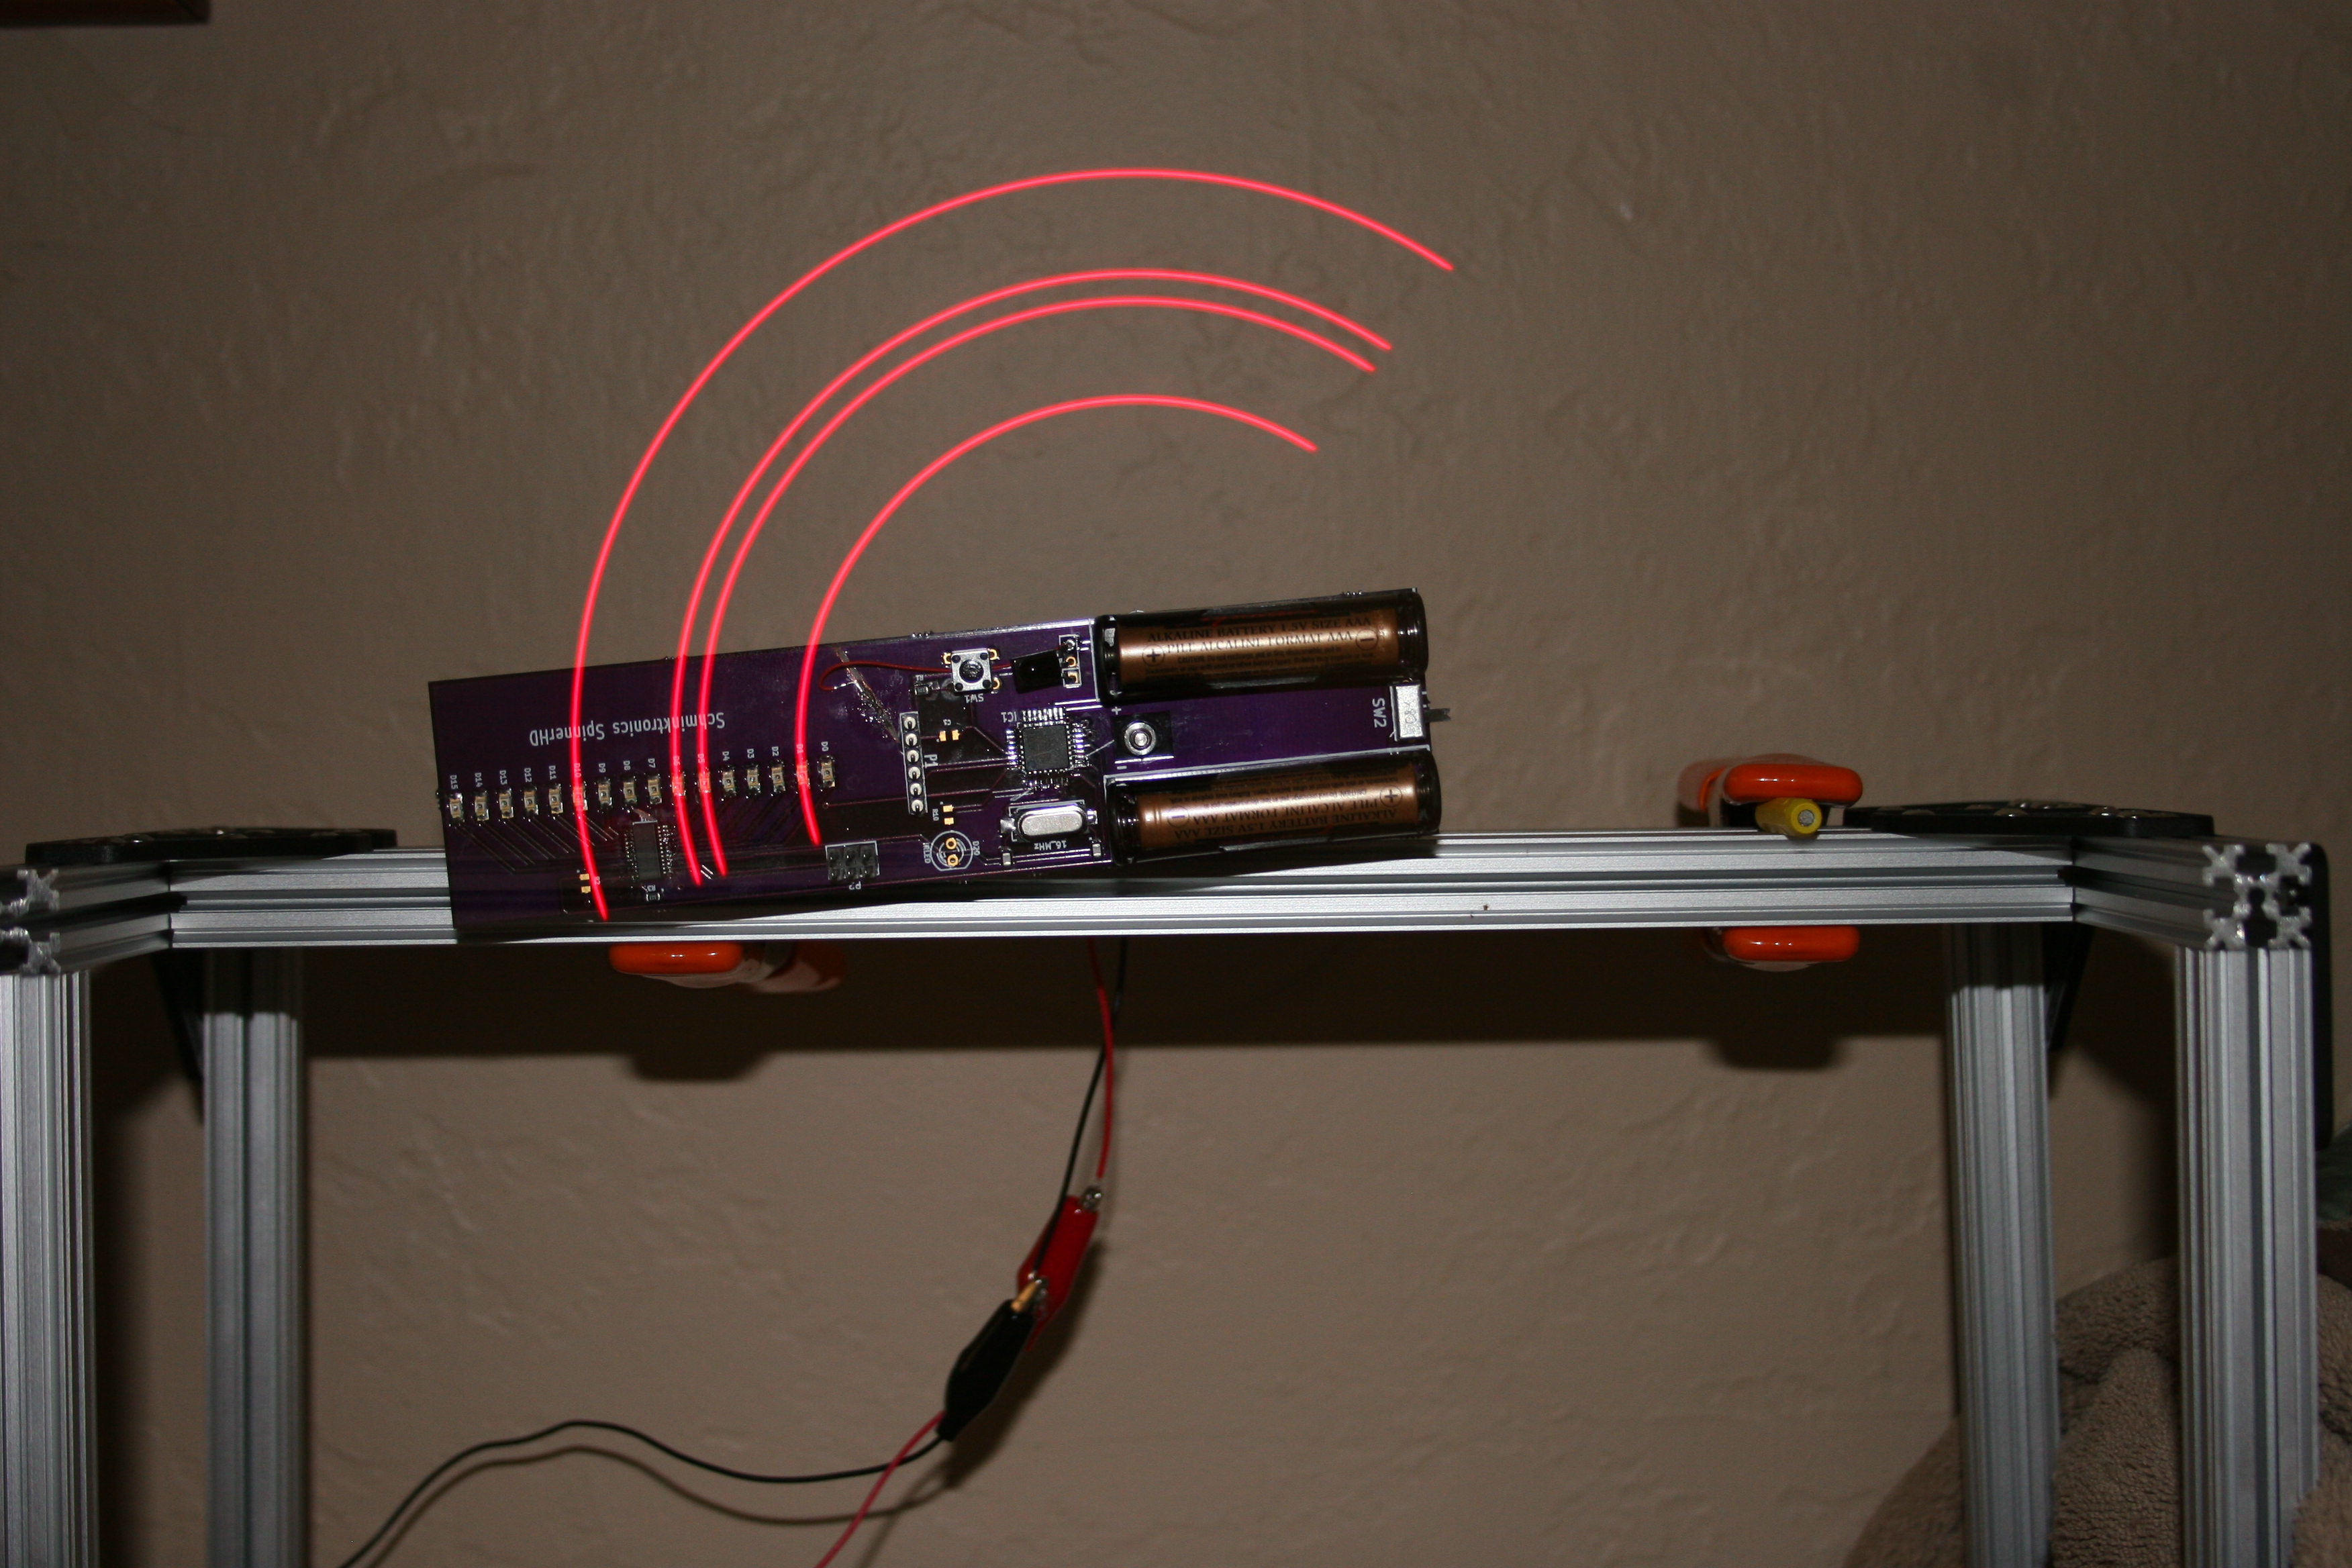
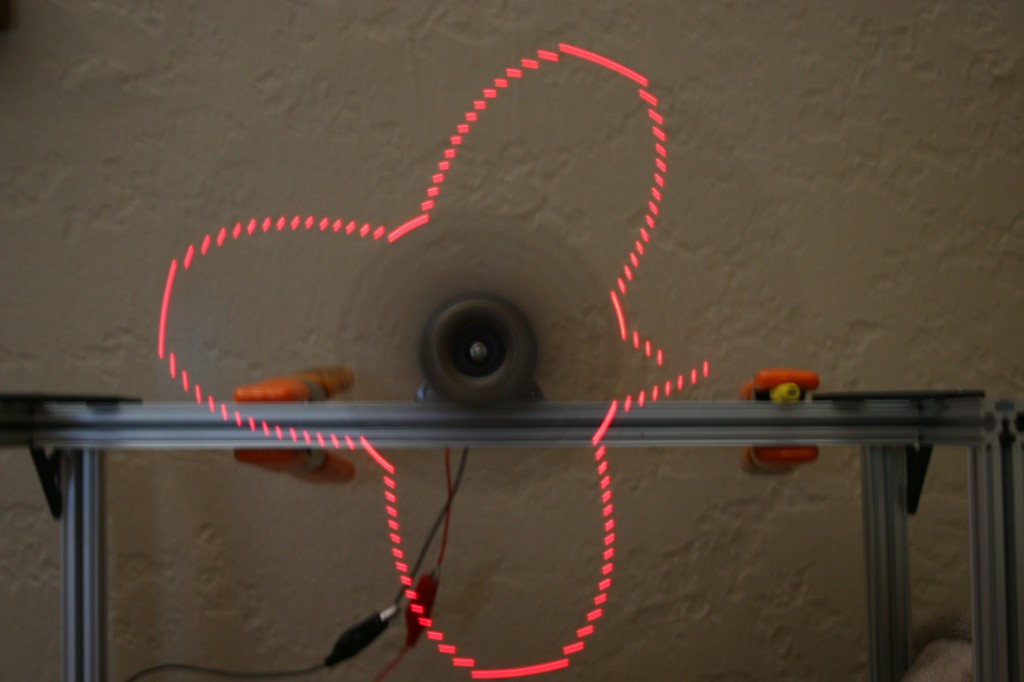
Now that the board is working, I thought I’d try a more interesting pattern, so I started with a sine wave. I wrote a quick python script to generate a nice looking sine wave:

1
2
3
4
5
6
7
8
9
10
11
12
13
14
15
16
17
18
19
20
import math
 
rows = 16
columns = 512
 
print "#define SIN_PATTERN_MAX %d" % columns
print "const int sinPattern[SIN_PATTERN_MAX] = {"
 
for x in range(0,columns):
    realx = 2 * math.pi * x / columns
    val =  (rows / 2) + (rows / 2)  * math.sin(realx)
    y = math.trunc ( val )
    if y &gt; (rows - 1):
        y = rows - 1
    #print '%*s' % ((y + 1), '*')
    print '0x%04X, ' % (1&lt;&lt;y),
    if (x &gt; 6 and (x - 7) % 8 == 0):
        print
 
print "};"

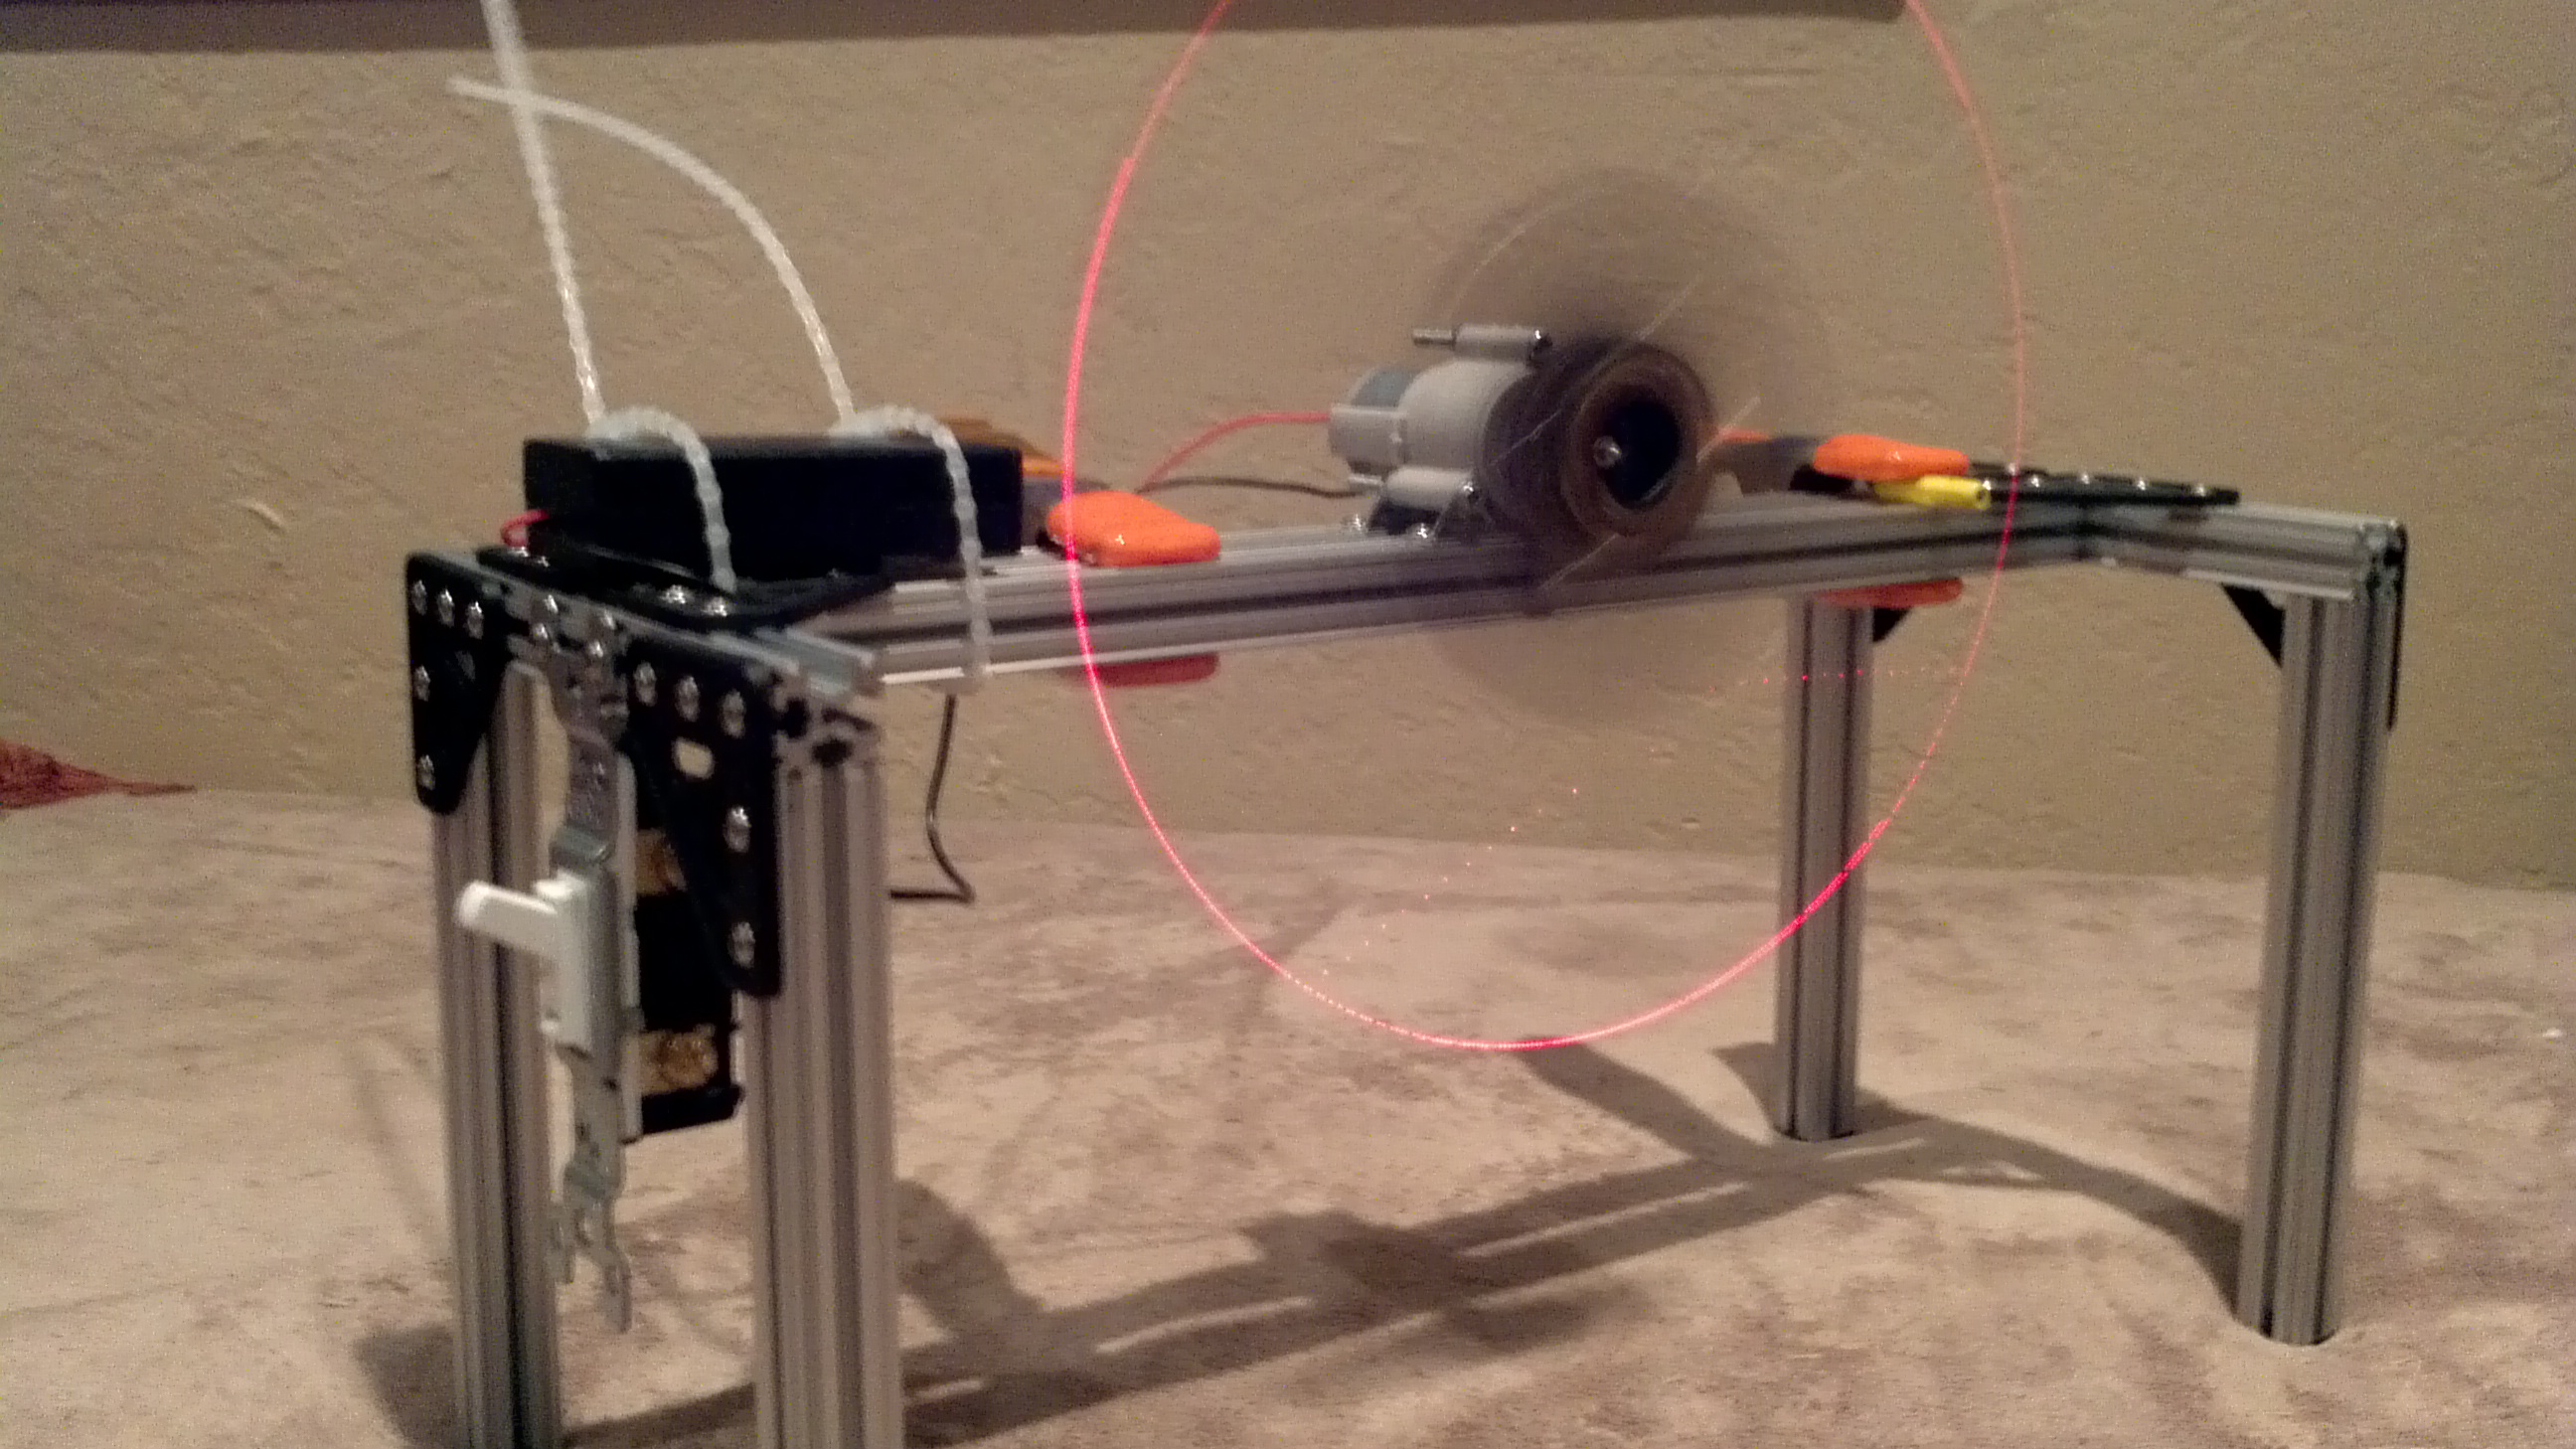
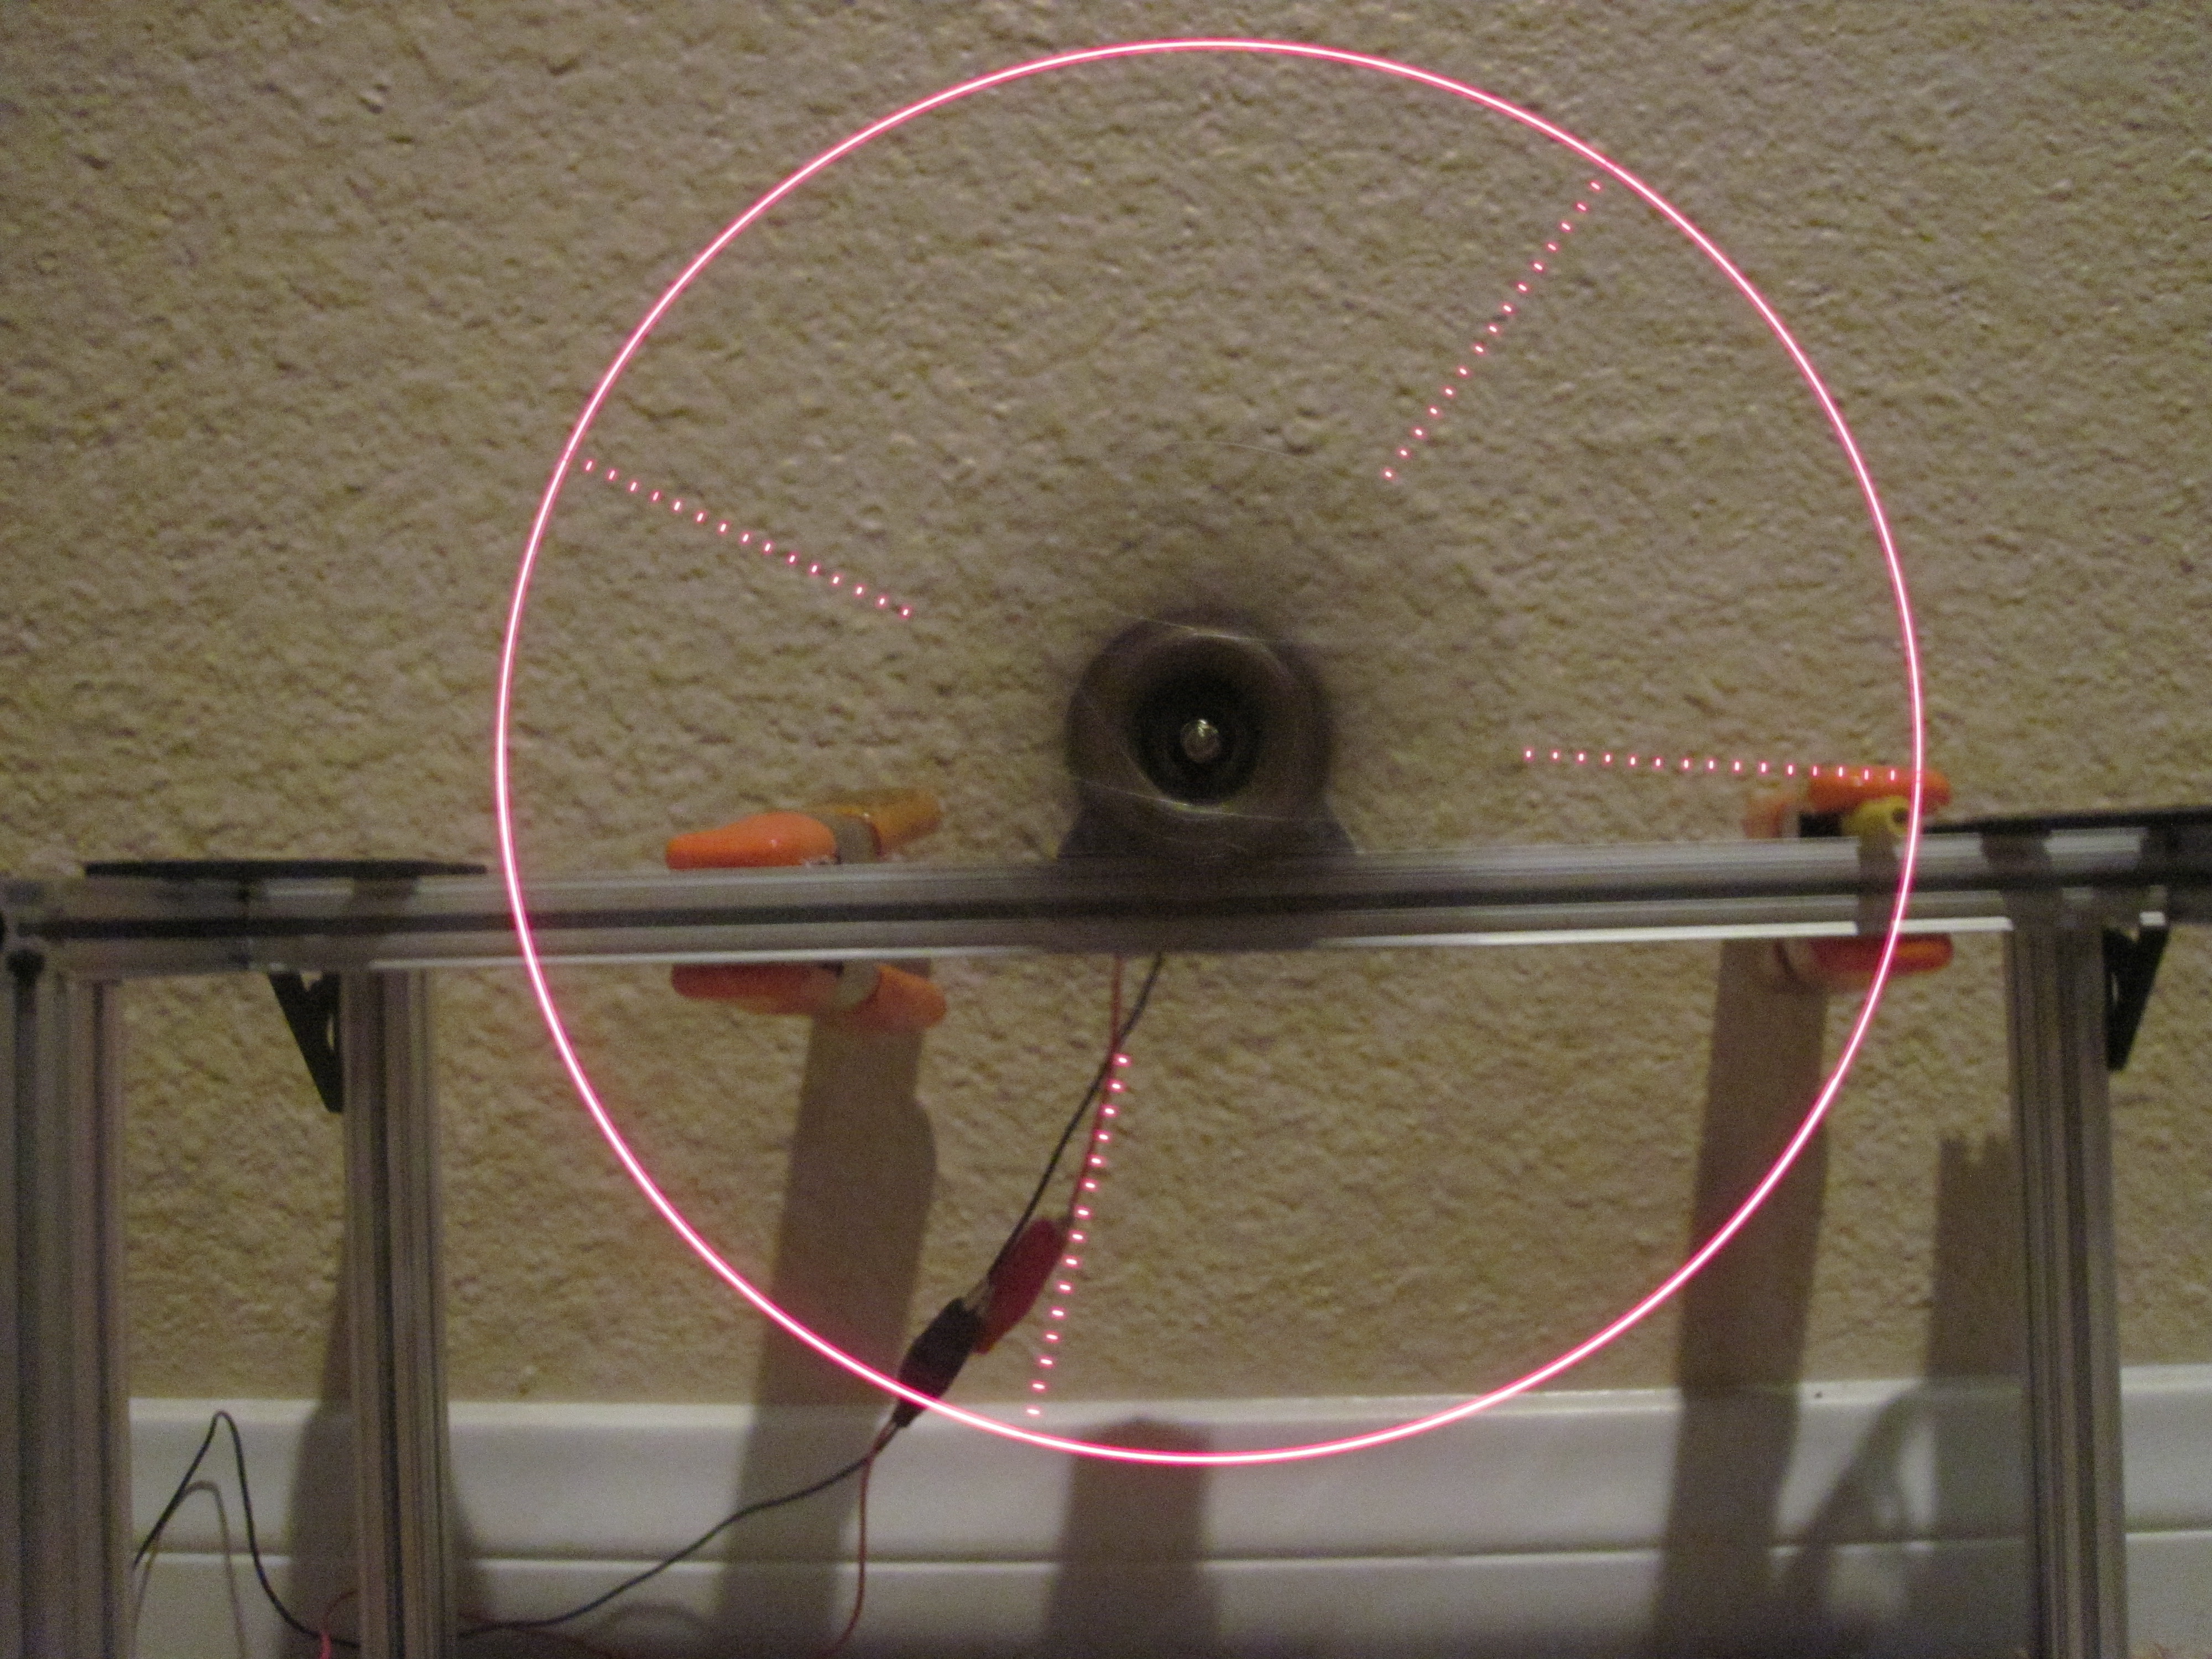
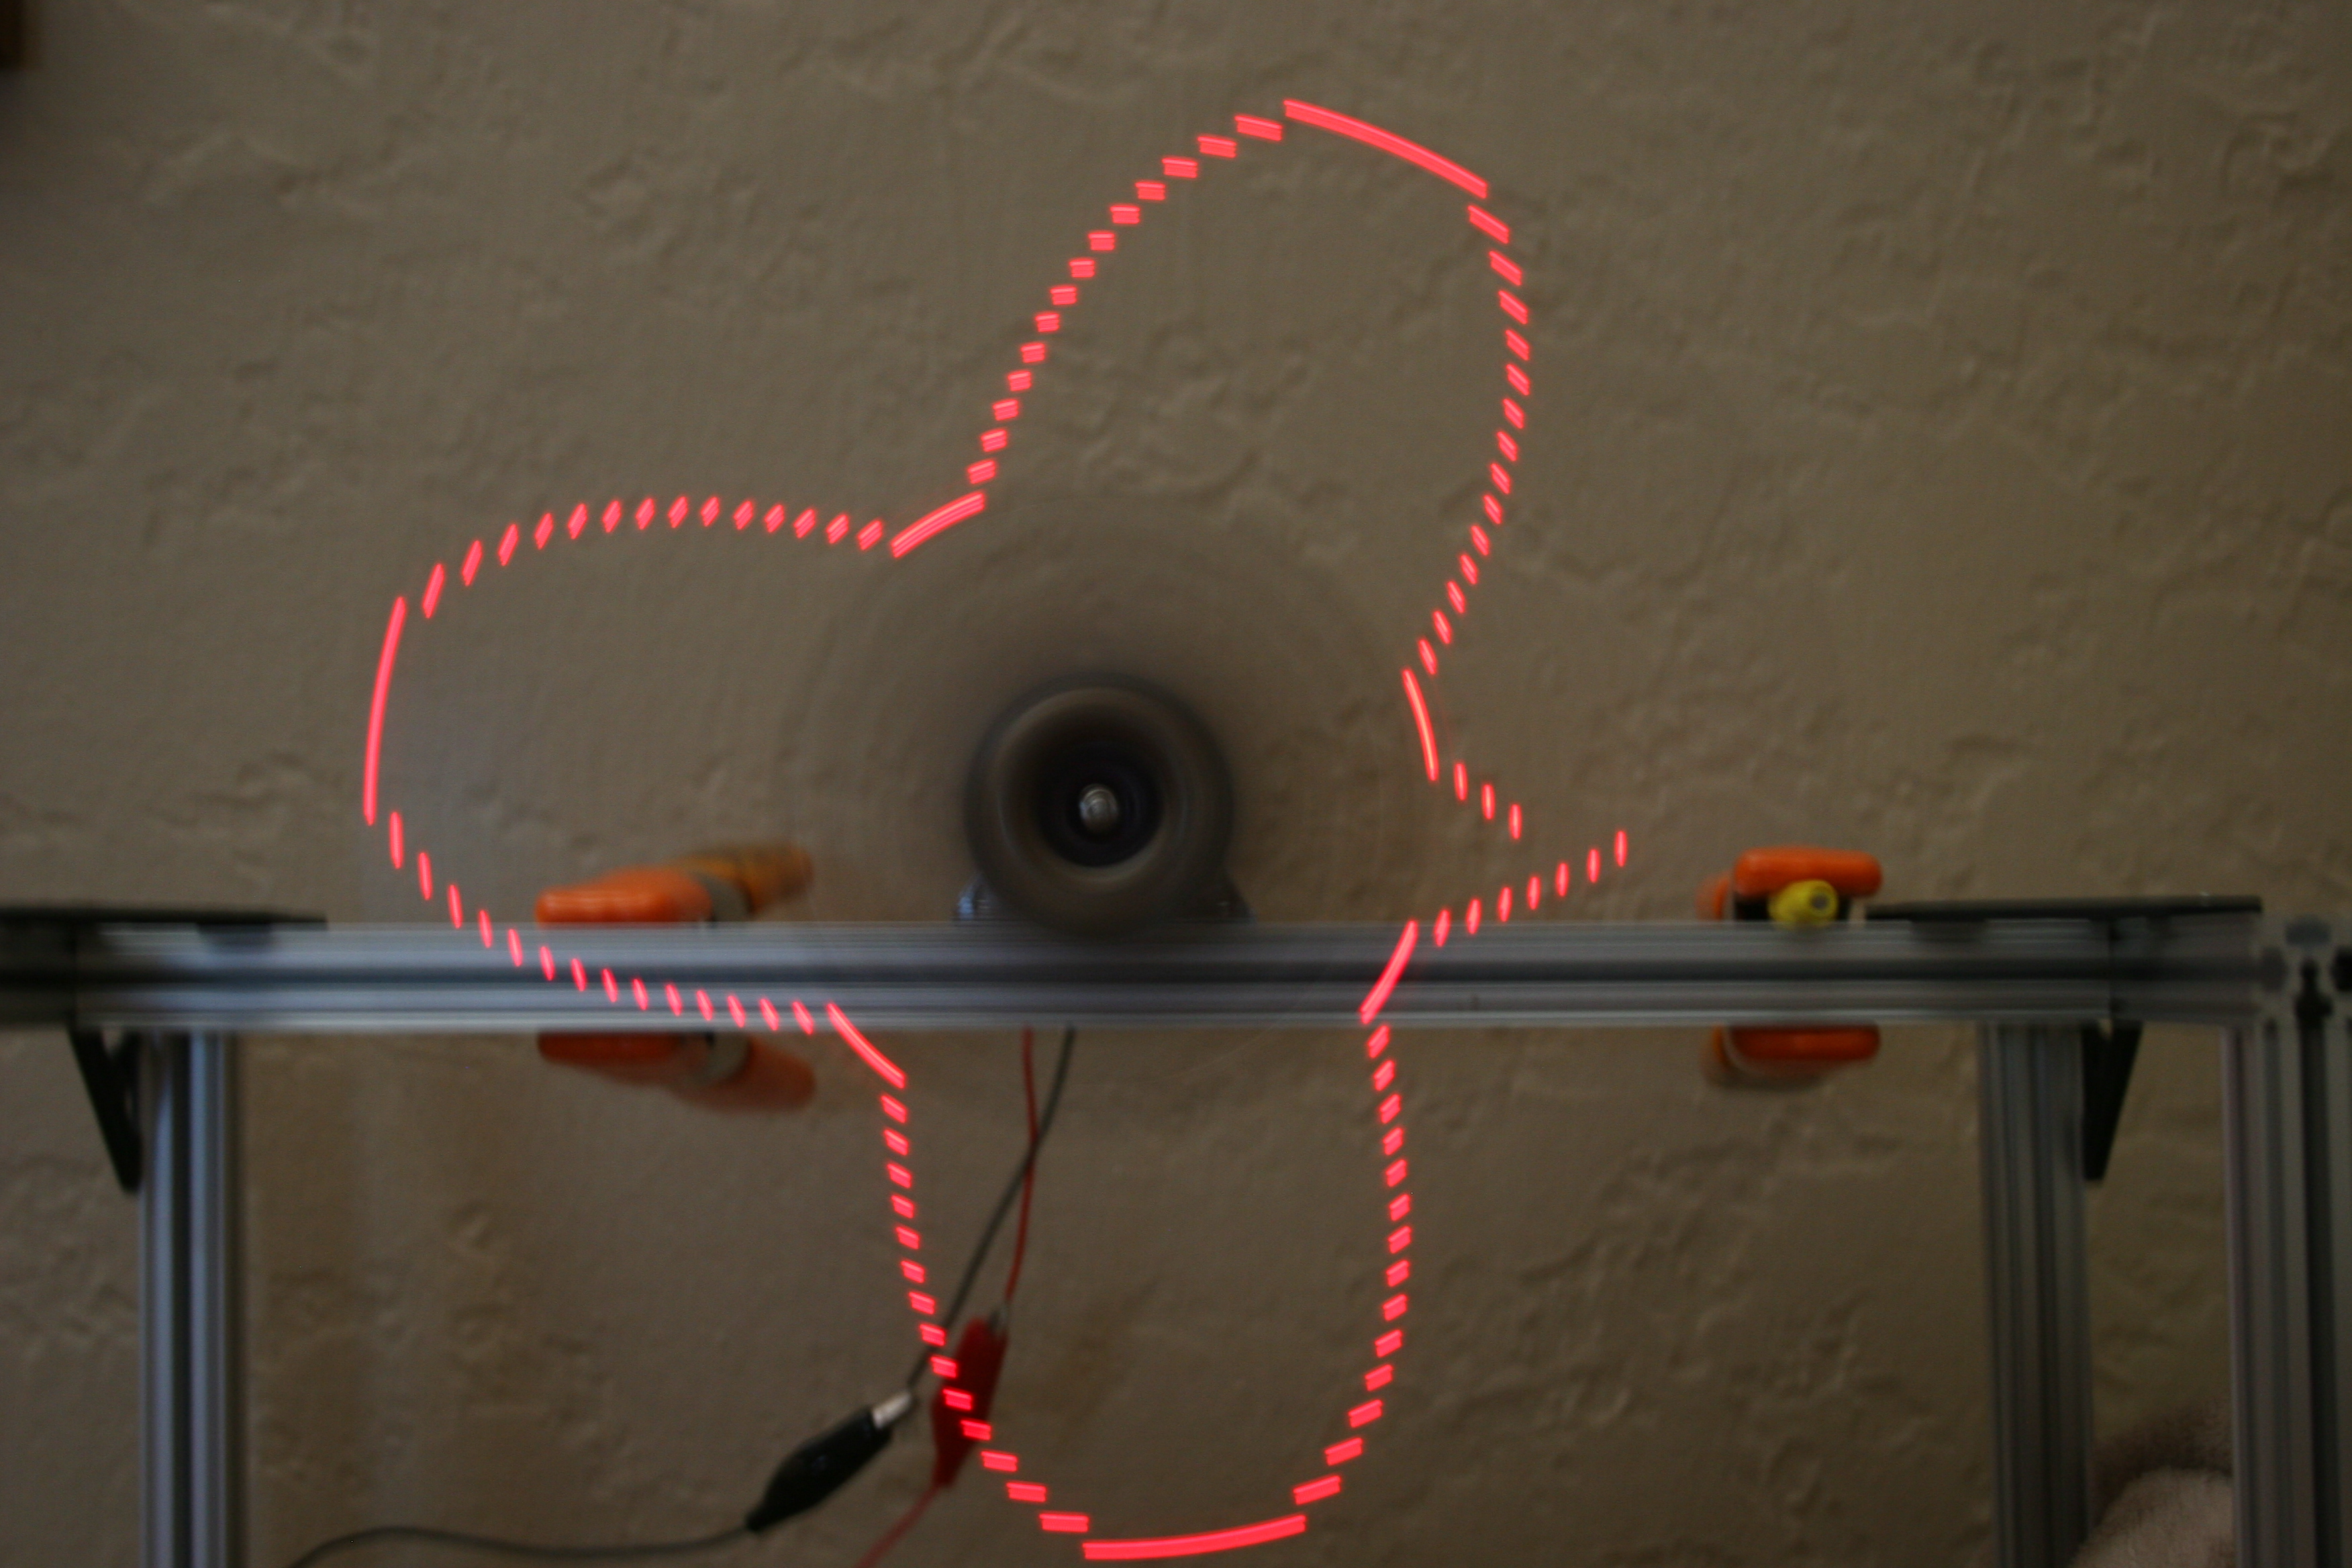
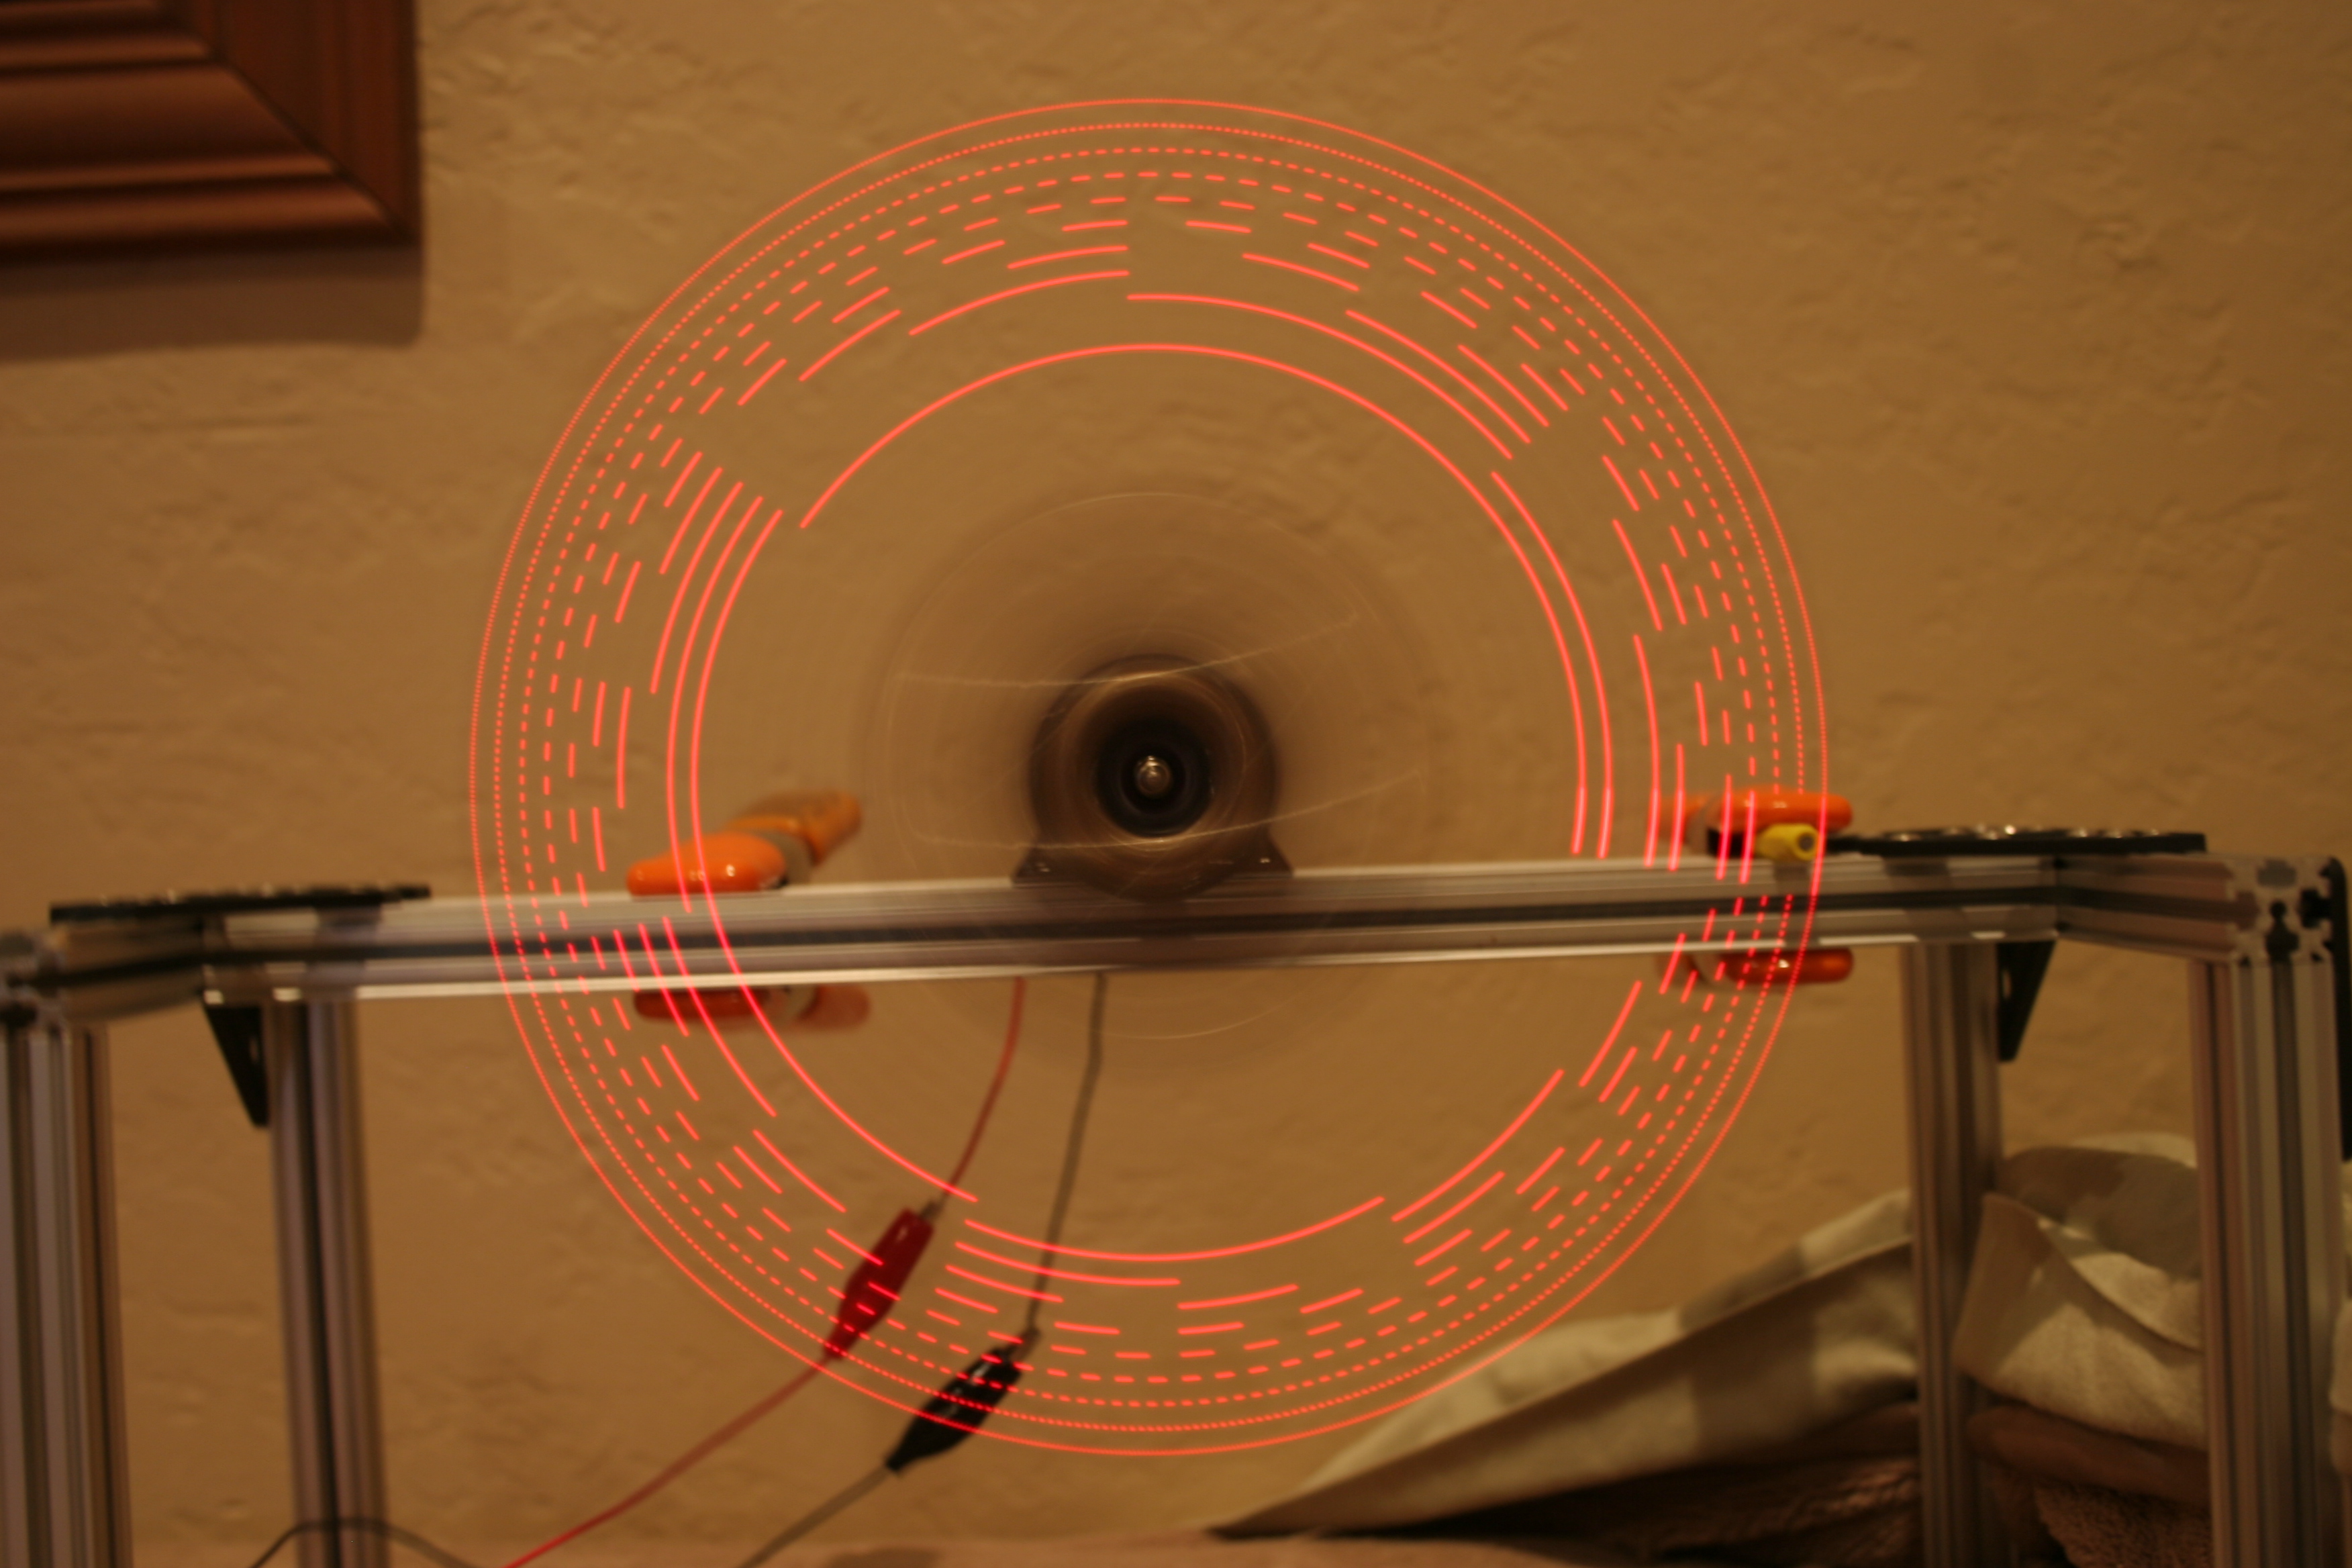
Looks great on the console (using that commented out line), but when I display it on the spinner, it looks terrible:

Sorry--I was lazy at trying to get the camera setup to take this entirely in focus and without extra motion.

Sorry–I was lazy at trying to get the camera setup to take this entirely in focus and without extra motion.

Obviously this doesn’t work well at all. I need to add correction for the different distances. I quickly realized that the spinner uses polar coordinates which the things I generally want to display use cartesian coordinates.Clearly what I need to do is convert between them!

In order to do that, for each LED, I need to know the distance from the center and the current angle. The distances are fixed and angles can be calculated. I know when the spinner is at one specific angle (in line with the magnet) and I can use one of the counters to determine how long it takes to go around one rotation. Once I know that, I can split that time into equal parts and use that to calculate the current angle.

Will this plan work? According to the datasheet, my motor runs at 10,500 rpm. I’ve got that on a 4:1 gearing so it runs at (10,500 / 4) = 2625 rpm, which is (2625 / 60) = 43.75 rps.

I assume I’ll have to use the 16-bit counter for this. How many clock cycles occur in one revolution? The clock runs at 16 MHz. 16,000,000 / 43.75 = 365,715 clock cycles. Does that fit in a 16 bit counter, which is 4 hex digits? 365,715 = 0x59493. No. So I have to enable a prescaler. According to the 328 datasheet, my options are /8, /64, /256, or /1024.

Will the /8 prescaler allow this value to fit? 0x59493 / 8 = 0xB292. Yep!

Since I used the 16 bit counter to get the revolution time, I have to use an 8 bit timer for the angle timing. How many angle slices should I use? To start, I’ll try 512 because it’s a power of 2, making it fast and easy to divide and it sounds like it may be a good divisor for the clock cycles. How many clock cycles does that leave for each angle? 365,715 cycles per revolution / 512 angles per revolution = 714 cycles per angle. This doesn’t fit in 8 bits, but if we enable the /8 prescaler, 714 / 8 = 89, which does fit in 8 bits, meaning this is still practical. (Note that these numbers don’t evenly divide, so I’ll have to play with it on the hardware to see how well this works.) This also means that I have 714 instruction cycles for each angle. We have to clock 16 bits out of SPI to set the LEDs. The SPI clock runs at half the processor clock, so 16 bits takes 32 instruction cycles to clock out. That still leaves 682 instruction cycles to do the calculation of the new LED states. Still sounds like we’re in the realm of possibility  so I’ll start testing it. If it doesn’t work, I can always drop down to 256 angle slices which will give me double the time to calculate each LED state.

Anyway–that’s a lot to deal with, but I haven’t actually done anything with the counter on the 328. So, to start with, I’ll setup the counter and find out if my calculations are correct about the clock cycles per revolution. I wish I had my IR output working so I could wirelessly send counter value, but the IR out also requires a counter/timer and I just don’t have that setup yet.

But, I have 16 LEDs available, so I can output a 16 bit value on those! My first test will:

  • Setup the 16 bit counter with a /8 prescaler
  • Each time the start position is detected in the ISR, save 16 bit counter value, then reset the counter to 0
  • In the main loop, if the saved counter value is not 0, set the LEDs to the new value, then set the saved value to 0.


Working board!

After being out of town for a few days, I was finally able to get board to the board and add a decoupling cap:

Ugly, but it works!

Ugly, but it works!

I tried putting a little super glue down to hold it in place, but that didn’t harden fast enough and ultimately caused more problems than it was worth. Despite what it looks like, I did use some actual wire (actually spare leads cut off from some through hole parts) in addition to the solder. It’s ugly, but it does actually solve my problem! No more spurious interrupts! Now I cat get my entire binary pattern displayed!

Binary Pattern

I still have my 1 ms delay in there from my testing to see if that fixes the interrupt problem, so that’s why the pattern stays constant around the magnet. But the rest of it looks great! Now I can finally get to programming REAL patterns!